Tuesday 28 November 2017

Filter by financial dimensions in AX 2012

Filter by financial dimensions in AX 2012

In this article, I'm going to show you how we can filet any form which has Financial as dimension. Like for instance on Items, Inventory transactions, Customers, Sales forecasts.

It was very easy in AX 2009 where we could add financial dimension to over view tab and get the filters work. Ware as in AX 2012 with advanced financial dimension structure it is not possible, but there are ways to do it.

One of the best way is to use out of box features.
 i.e Advanced Filet option File--> Edit--> Filter--> Advanced filter/sort where we can see the filter criteria like Dimensions.CostCentre, Dimensions.Department, Dimensions.XXX.

Lets do a demo on Vend trans, so I want to apply filter on VendTrans based on Dimension Department and Purpose.
To do this Go to
1. Accounts payable/Common/Vendors/All vendors
2. Select a vendor and click on Transaction.
3. Now go to File--> Edit--> Filter--> Advanced filter/sort 
4. Give the values for the filter and click ok.

This will work for all the forms where financial dimensions are used.


Tuesday 3 October 2017

Setting "Print Management" through x++ AX 2012 R3

Some times, if you want to set the "Print Management" for many customer will be a tedious job. In that case you may use the below code and make your life easy. 
The code goes as below. 

///
/// Job to set the PrintManagement 
/// Mallik on 04/10/2017
///
static void  MK_Set_PrintManagement1(Args _args)
{
 
  PrintMgmtSettings             printMgtSettings;
  PrintMgmtDocInstance          printMgtDocInstance;
  SRSPrintDestinationSettings   printDestinationSettings;
  PrintMgmtReportFormat         PrintMgmtReportFormat;
  PrintMgmtDocumentType         PrintMgmtDocumentType;
  PrintMgmtDocInstanceType      PrintMgmtDocInstanceType;
  NoYes                         NoYes;
  SRSReportFileFormat           SRSReportFileFormat;
  SRSPrintMediumType            SRSPrintMediumType;
  str                                  EmailTo;
  CustTable                     lCustTable;
  LogisticsElectronicAddress    elecAddress;
  container                     record;
  int                               totalRecords;
  container                     printerSetting = conNull();
  try
  {
      while select lCustTable where lCustTable.AccountNum == 'C5002'
      {
          totalRecords = totalRecords + 1;
          select firstOnly elecAddress
            where elecAddress.Location == DirPartyLocation::findOrCreate(lCustTable.Party, 0).Location
            && elecAddress.Type == LogisticsElectronicAddressMethodType::Email; 
          if (elecAddress.RecId)
          {
              EmailTo                       =  elecAddress.Locator;
          }

          printDestinationSettings =   new SRSPrintDestinationSettings(printerSetting);
          printDestinationSettings.unpack(printerSetting);
          printDestinationSettings.caption("@SYS131685");
          printDestinationSettings.emailTo(EmailTo);
          printDestinationSettings.printMediumType(SRSPrintMediumType::BTDPA_Process);
          printDestinationSettings.emailSubject('Invoice');
          printDestinationSettings.emailAttachmentFileFormat(SRSReportFileFormat::PDF);
          printDestinationSettings.numberOfCopies(1);
          printMgtDocInstance=PrintMgmtDocInstance::find(lCustTable.RecId, lCustTable.TableId, PrintMgmtNodeType::CustTable,1 ,1);
          ttsBegin;
          
          if (printMgtDocInstance)
          {
              printMgtDocInstance.selectForUpdate(true);
          }
          printMgtDocInstance.Name           = "AutoDelivery";
          printMgtDocInstance.DocumentType   = 1;
          printMgtDocInstance.PrintType      = PrintMgmtDocInstanceType::Original;
          printMgtDocInstance.PriorityId     = 1;
          printMgtDocInstance.Suppress       = NoYes::No;
          printMgtDocInstance.ReferencedTableId  =  lCustTable.TableId;
          printMgtDocInstance.ReferencedRecId    =  lCustTable.RecId;
          printMgtDocInstance.NodeType           =  PrintMgmtNodeType::CustTable;
          
          if (printMgtDocInstance)
                  printMgtDocInstance.update();
          else
                  printMgtDocInstance.insert();
          select firstOnly printMgtSettings order by PriorityID where printMgtSettings.ParentId==printMgtDocInstance.RecId && printMgtSettings.PriorityID==1;
          if (printMgtSettings)
          {
              printMgtSettings.selectForUpdate(true);
          }
          printMgtSettings.ParentId           = printMgtDocInstance.RecId;
          printMgtSettings.ReportFormat       = PrintMgmtReportFormat::findByDescription(1,'SalesInvoice.Report').RecId;
          printMgtSettings.PrintJobSettings   = printDestinationSettings.pack();
          printMgtSettings.NumberOfCopies     = 1;
          printMgtSettings.PriorityId         = 1;
          if (printMgtSettings)
                  printMgtSettings.update();
          else
                  printMgtSettings.insert();
          ttsCommit;
          if(printMgtDocInstance && printMgtSettings)
          {
              info(strFmt("Total recoreds updated: %1",totalRecords));
          }
          else
          {
              error(strFmt("Total recoreds updated: %1",totalRecords));
          }
      }
  }
  catch(Exception::Error)
  {
      Throw(Exception::Error);
  }
  info(strFmt("Total Read Records = %1",totalRecords));
}


Tuesday 26 September 2017

DIXF: Importing any table data with Financial Dimension (default Dimension) field in the table

DIXF: Importing any table data with Financial Dimension (default Dimension) field in the table

Lets say, I want to import the data into MKxyz Table with 3 fields as below.

1. StId
2. StName
3. DefaultDimension

Source: 
In the source we have the Dimension as
Department : A01
Purpose : Std
Ex:
StID,StName,Dept,Purpose
1,abc,A01,Std
2,xyz,A02,Ptc

Solution :

Here I am not going to talk about, how to import data using DIXF for that you can refer here
So now we are going to talk about, how to convert the above CSV file to use with DIXF.
we need to convert the file as below.
StID,StName,DefaultDimension
1,abc,A01--Std
2,xyz,A02--Ptc

To summaries
DefaultDimension is give as per the dimension sequence setup
lets say the sequence is
1. Department ,Cost-center and purpose
then the value in Default Dimension field is DD-CC-PP
2. Department ,Cost-center and purpose and we don't have cost-center value
then the value in Default Dimension field is DD--PP
3. Department ,Cost-center and purpose and we don't have purpose value
then the value in Default Dimension field is DD-CC-


Sunday 24 September 2017

Update Customer / Vendor Email address or phone number AX 2012 X++

In this topic, we will learn how to update the customer / vendor Email Address  or Phone number
static void MK_CustomeremailUpdate(Args _args)
{
    DirPartyTable            dirparty;
    DirPartyLocation dirPartyLocation;
    LogisticsElectronicAddress elecAddress;
    LogisticsElectronicAddressRole elecAddressRole;
    LogisticsLocationRole locRole;
    CustTable                           cust = CustTable::find('CXXX'');///Replace with vendTable for Vendors
// Update all the customers use the while loop or you can just use the above fine method to get the customer.  
while select cust
    where cust.AccountNum != " "
    {
        select forUpdate firstOnly elecAddress
        where elecAddress.Location == DirPartyLocation::findOrCreate(cust.Party, 0).Location
        && elecAddress.Type == LogisticsElectronicAddressMethodType::Email; // Replace with Phone to update phone number
        if (elecAddress.RecId)
        {
            info(strFmt("%1 , %2 - email - %3", cust.AccountNum, cust.name(),elecAddress.Locator));
            ttsBegin;
            elecAddress.Type = LogisticsElectronicAddressMethodType::Email; // for phone type should be phone
            elecAddress.Locator = 'xxx.aaa@xxx.com'; // for phone number give the new Phone number
            elecAddress.update();
            ttsCommit;
            info(strFmt("%1 , %2 - email - %3", cust.AccountNum, cust.name(),elecAddress.Locator));
        }
       
    }
}

Thursday 7 September 2017

Virtual Machine(VM) setup to access Dynamics 365 for Operation instance.

https://dynamicsax708.wordpress.com/2017/03/16/virtual-machinevm-setup-to-access-dynamics-365-for-operation-instance/

References:

SI NOTOPICSSOURCES
1Access Microsoft Dynamics 365 for Operations instanceshttps://ax.help.dynamics.com/en/wiki/access-microsoft-dynamics-ax-7-instances-2/
2Installation of Hyper-V and creating virtual machinehttps://technet.microsoft.com/enus/library/hh846766(v=ws.11).aspx

Tuesday 8 August 2017

Using system classes to connect to database x++

Here in this topic, we will learn about how to connect SQL database using standard classes (without creating ODBC connection.

The code below uses the ODBCConnection class and LoginProperty class to connect to SQL DB.

server static ODBCConnection createConnection(str _SQLServerName, str _DatabaseName)
{
    ODBCConnection  connection;
    LoginProperty   loginProperty;
    ;
    loginProperty = new LoginProperty();
    loginProperty.setServer(_SQLServerName);


    loginProperty.setDatabase(_DatabaseName);

    connection = new ODBCConnection(loginProperty);

    return connection;
}

It will return the connection, which can be used to execute SQL statements.

Friday 4 August 2017

Unpicking the sales order all at once AX 2012 x++

Unpicking the sales order all at once AX 2012 x++

Some times we need to cancel the picking sales order, for whatever reason.
if you want to unpick an  sales order, you have to go to the sales line and, one-by-one, unpick the order. You click on the Inventory button and select the Pick option. In the form, check the autocreate box, then click Post All in the lower area of the form. If you regularly have to pick and unpick orders, especially if you have a lot of lines on your orders, this can become very tedious.

To achieve the above functionality, we can just create a button on Sales Order form . Now I'm going to put an Unpick button on the sales order form at the order level and allow certain users (security will be used) to do this. I will most likely allow multiple orders to be selected so you can unpick multiple orders with one click of a button. The code for the this is as below:

1. Create a class "Mk_PickSalesUnReservation"
2. Add a main method with Args as parameters // This will accept SalesLine as Data source
static void main(Args _args)
{
}
3. add a run method and call it.

///
/// Contains the code that does the actual job of the class.
///
void  run()
{
    InventTrans                 inventTransLocal;
    InventTransOriginSalesLine  inventTransOriginSalesLine;
    InventTransOrigin           inventTransOrigin;
    SalesLine                   salesLine;
    InventMovement              movement;
    InventTransWMS_Pick         inventTransWMS_Pick;
    TmpInventTransWMS           tmpInventTransWMS;
    Query                       baseQueryInventTrans;
    QueryBuildDataSource        qbdsInventTrans;
    MultiSelectionHelper helper = MultiSelectionHelper::construct();

    baseQueryInventTrans =  new Query();
    qbdsInventTrans = baseQueryInventTrans.addDataSource(tableNum(InventTrans));
    baseQueryInventTrans.dataSourceTable(tableNum(InventTrans));
    qbdsInventTrans.clearDynalinks();
    qbdsInventTrans.clearRanges();
    qbdsInventTrans.addRange(fieldNum(InventTrans,StatusReceipt)).value(SysQuery::value(StatusReceipt::None));
    qbdsInventTrans.addRange(fieldNum(InventTrans,StatusIssue)).value(SysQuery::range(StatusIssue::Picked,StatusIssue::OnOrder));

    //inventTransWMS_Pick = InventTransWMS_Pick::newStandard(tmpInventTransWMS,baseQueryInventTrans);

    helper.parmDatasource(salesLine_ds);

    salesLine = helper.getFirst();
    while (salesLine.RecId != 0)
    {
        salesLine.selectForUpdate(true);
        //sALESlINE.iNVENTtRANSiD -> inventtransorigin.inventtransid -> inventrans
        select inventTransLocal
        where  inventTransLocal.ItemId                  == salesline.ItemId
            && inventTransLocal.StatusIssue             == StatusIssue::Picked
        exists join inventTransOrigin
        where   inventTransOrigin.RecId                  == inventTransLocal.InventTransOrigin
        &&      inventtransorigin.inventtransid         == salesline.InventTransId;

        if (inventTransLocal.RecId)
        {          

            tmpInventTransWMS = null;
            tmpInventTransWMS.initFromInventTrans(inventTransLocal);
            tmpInventTransWMS.InventQty = inventTransLocal.StatusIssue == StatusIssue::Picked ? inventTransLocal.Qty : -inventTransLocal.Qty;
            tmpInventTransWMS.insert();
            inventTransWMS_Pick = InventTransWMS_Pick::newStandard(tmpInventTransWMS,baseQueryInventTrans);
            inventTransWMS_Pick.createFromInventTrans(inventTransLocal);
            inventTransWMS_Pick.updateInvent();
        }
        salesLine = helper.getNext();
    }

}

4. Create a action menu Item for the above class
5. Add a menu Item button on Sales order form.

Sunday 23 July 2017

Framework to create XML file from a query and read XML data

We have many frameworks like AIF, DIXF, etc. already available out of box in dynamics AX to export or import the data, you guys might have guessing why again a new framework?

The reason is simple, I just wanted to build one simple framework, which takes a query as input and gives the XML file with all the fields in the query. It is as that simple.

In the below example, I have a created a query for sales order, with Data source as SalesTable and Salesline. I have added few fields from Sales Table and also form sales line. The query look like this.


Query
Now I want to pass this Query and get the XML with all the fields which are ther in the query and also with the where condition (Range)

Now I have to create a FW class, which has a construc method which takes the Query as parameter as shown below.
public static server MK_ExportHelp construct(Query _query)
{
    return new MK_ExportHelp(_query);
}
This method call's the new method as below
protected void new(Query _query)
{
    dataQuery = _query;
}

///

/// This method is used to create a XML form the query
///
///
/// File path where the xml will be stored
///
///
/// Primary field to identify unique record
///
///
/// Export helper class by Mallik on 25/07/2017
///

public void getXMLFile(Filename _filePath,FieldID   _uniqueFieldID)
{
    container               lDSTablesCon;
    container               lFieldLists;
    int                     j,k;
    Query                   lquery;
    QueryRun                queryRun;
    QueryBuildDataSource    qbds;
    TableId                 lTableId;
    str                     tableName;
    Common                  commonTable;
    FileIoPermission        lPerm;
    str                     uniqFieldVal,preVal;
    boolean                 headChanged;

    XmlDocument xmlDoc; //to create blank XMLDocument
    XmlElement xmlRoot; // XML root node
    XmlElement xmlField;
    XmlElement xmlRecord;
    XmlElement xmlChild;
    XMLWriter xmlWriter;
    InventTable inventTable;
    DictTable dTable;// = new DictTable(tablenum(InventTable));
    DictField dField;
    int i, fieldIds;
    FieldId     lfieldId;
    str value;

    lDSTablesCon = this.getDataSource();
    if(lDSTablesCon != conNull())
    {
        lquery = new query(dataQuery);
        xmlDoc = XmlDocument::newBlank();
        xmlRoot = xmlDoc.createElement(lquery.name());

        queryRun = new QueryRun(lquery);
        k =0;
        //headChanged  = false;
        while (queryRun.next())
        {
            k++;
            headChanged = false;
            for(j = 1; j <= conLen(lDSTablesCon); j++)
            {
                tableName = conPeek(lDSTablesCon,j);
                lTableId = tableName2id(tableName);
                dTable = new DictTable(lTableId);
                lFieldLists = conPeek(allFieldlist,j);
                fieldIds = conLen(lFieldLists);
                commonTable =  queryRun.get(lTableId);

                if (k != 1 && uniqFieldVal != commonTable.(_uniqueFieldID))
                {
                    uniqFieldVal = commonTable.(_uniqueFieldID);
                    if (preVal != uniqFieldVal)
                    {
                        headChanged = true;
                    }
                    else
                    {
                        headChanged = false;
                    }
                    //continue;
                }
                if (k != 1 && !headChanged)
                {
                    headChanged = true;
                    continue;
                }
                preVal  = commonTable.(_uniqueFieldID);
                //info(common.(fieldnum(custTable, name)));
                // Loop through all the fields in the record
                // Create a XmlElement (record) to hold the
                // contents of the current record.
                if (j == 2)
                {
                    xmlChild = xmlDoc.createElement(tableName);

                }
                else
                {
                    xmlRecord = xmlDoc.createElement(tableName);
                }
                for (i=1; i<=fieldIds; i++)
                {
                    lfieldId = dTable.fieldName2Id(conPeek(lFieldLists,i));
                    // Find the DictField object that matches
                    // the fieldId
                    dField = dTable.fieldObject(lfieldId);

                    // Create a new XmlElement (field) and
                    // have the name equal to the name of the
                    // dictField
                    xmlField = xmlDoc.createElement(dField.name());
                    // Convert values to string. I have just added
                    // a couple of conversion as an example.
                    // Use tableName.(fieldId) instead of fieldname
                    // to get the content of the field.
                    switch (dField.baseType())
                    {
                        case Types::Int64 :
                        value = int642str(commonTable.(lfieldId));
                        break;
                        case Types::Integer :
                        value = int2str(commonTable.(lfieldId));
                        break;
                        default :
                        value = commonTable.(lfieldId);
                        break;
                    }
                    // Set the innerText of the XmlElement (field)
                    // to the value from the table
                    xmlField.innerText(value);
                    // Append the field as a child node to the record

                    if (j == 2)
                    {
                       xmlChild.appendChild(xmlField);
                       xmlRecord.appendChild(xmlChild);
                    }
                    else
                    {
                        xmlRecord.appendChild(xmlField);
                    }
                }// end of for
                // Add the record as a child node to the root
                xmlRoot.appendChild(xmlRecord);
            }// end of TableID for loop
           /* // Add the record as a child node to the root
            xmlRoot.appendChild(xmlRecord);*/
        }// end of while
        // Add the root to the XmlDocument
        xmlDoc.appendChild(xmlRoot);
        lPerm = new FileIoPermission(_filePath,'RW');
        lPerm.assert();
        // Create a new object of the XmlWriter class
        // in order to be able to write the xml to a file
        xmlWriter = XMLWriter::newFile(_filePath);//----------------------------------@"c:\Items.xml");
        // Write the content of the XmlDocument to the
        // file as specified by the XmlWriter
        xmlDoc.writeTo(xmlWriter);
    }// end of if
}

Internally this method calls getTable method and getFields which will return respective datasource tables and all the fields in the query. And here is the code for it.
public container getDataSource()
{
    query                   query;
    queryRun                queryRun;
    int                     numDataTables,numFields;
    int                     i,j;
    TableId                 lTableId;
    container               conDataTables;
    container               conFieldList;
    QueryBuildDataSource    qbds;
    QueryBuildFieldList     fieldList;
    query = new query(dataQuery);//  ('CustTableCube');
    numDataTables = query.dataSourceCount();
    allFieldlist = conNull();
    for (i =1;i <=numDataTables;i++)
    {
       calledDataSource = true;
       qbds =  query.dataSourceNo(i);
       lTableId = qbds.table();
       conDataTables = conIns(conDataTables,i,tableId2name(lTableId));
       fieldList = qbds.fields();
       numFields = fieldList.fieldCount();
       conFieldList = conNull();
       for (j=1; j <= numFields; j++)
        {
            conFieldList = conIns (conFieldList,j,fieldId2name(lTableId,fieldList.field(j)));
        }
        allFieldlist = conIns(allFieldlist,i,conFieldList);
    }
    return conDataTables;
}
public container getAllFields()
{
    if (calledDataSource)
    {
        return allFieldlist;
    }
    else
    {
        this.getDataSource();
        return allFieldlist;
    }
}

--------------------------------------------------------------------------------------------------------------------------Now the second part to read the XML data and return a container
--------------------------------------------------------------------------------------------------------------------------

The Final part is now, how we can read the data form the above created XML. Below is the code which can read the data form the XML and returns a container.
public container readXMLData(FileName    _fileName)
{
    #define.node('Envelope')
    XmlDocument xmlDocument;
    XmlNode     xmlInformationNode;
    XmlNode     xmlInformationNode1;
    XmlNodeList xmlInformationsNodeList;
    XmlNodeList xmlChildNodeList;
    XmlNodeList xmlChildNodeList1;
    XmlNodeList xmlChildNodeList2;
    XmlNodeList xmlChildNodeList3;
    XmlNodeList xmlChildNodeList4;
    XmlNodeList xmlChildNodeList5;
    XmlElement  nodeTable;
    XmlElement  salesTableNode;
    XmlElement  salesLineNode;
    XmlElement  finDimNode;
    int         m,i,l;
    int         j, k;
    container        headerCon, lineCon, recCon, retCon;
    int          nodecount;
    boolean      finDim = false;
    FileIOPermission        fioPermission;
    Commaio                 file;
    Map             recHeadData,recLineData;
    #define.filename(_fileName)
    #file
    CustAccount  accNum;
    nodecount = 0;

    // Assert permission.
    fioPermission = new FileIOPermission(#filename ,"R");
    fioPermission.assert();


    xmlDocument             = xmlDocument::newFile(_fileName);
    info(xmlDocument.documentElement().nodeName());
    xmlInformationsNodeList = xmlDocument.documentElement().childNodes();
    m = xmlInformationsNodeList.length();
    setPrefix("@SYS98689");
    headerCon = conNull();
    lineCon = conNull();
    recCon = conNull();
    retCon = conNull();
    recHeadData = new Map(Types::String, Types::String);
    recLineData = new Map(Types::String, Types::String);
    for ( m = 0; m < xmlInformationsNodeList.length(); m++) //Num of Recoreds-
    {
        headerCon = conNull();
        lineCon = conNull();
        recHeadData = new Map(Types::String, Types::String);
        recLineData = new Map(Types::String, Types::String);
        xmlChildNodeList = xmlInformationsNodeList.item(m).childNodes();
        j = xmlChildNodeList.length();
        l = 0;
        for (j = 0; j < xmlChildNodeList.length() ; j++)// num rows in record (Fields) header nodes-
        {
            xmlChildNodeList1 = xmlChildNodeList.item(j).childNodes();
            xmlInformationNode1 = xmlChildNodeList1.item(j);
            nodeTable    = xmlChildNodeList.nextNode();
            if (xmlInformationNode1 != null && xmlInformationNode1.hasChildNodes())
            {
                l++;
                k = xmlChildNodeList1.length();
                for (k = 0; k < xmlChildNodeList1.length() ; k++)// Fields has sub elemets (Lines) Node
                {
                    xmlInformationNode = xmlChildNodeList1.item(k);
                    nodeTable    = xmlChildNodeList1.nextNode();
                    recLineData.insert(nodeTable.nodeName(),nodeTable.text());
                 
                    if (xmlInformationNode.hasChildNodes())//getNamedElement('CustAccount');
                    {
                        xmlChildNodeList2 = xmlInformationNode.childNodes();
                        nodeTable = xmlChildNodeList2.nextNode();
                        // Line record
                       // lineCon = lineCon +  nodeTable.text();
                    }
                    //info(strFmt('%1 -> %2', xmlInformationNode.nodeName(), xmlInformationNode.innerText()));
                }// for k
                //lineCon += recLineData.pack();
                lineCon = conIns(lineCon,l, recLineData.pack());
            }
            else if (j == xmlChildNodeList.length() -1)
            {
                l++;
                for (k = 0; k < xmlChildNodeList1.length() ; k++)// Fields has sub elemets (Lines) Node
                {
                    xmlInformationNode = xmlChildNodeList1.item(k);
                    nodeTable    = xmlChildNodeList1.nextNode();
                    recLineData.insert(nodeTable.nodeName(),nodeTable.text());
                    if (xmlInformationNode.hasChildNodes())//getNamedElement('CustAccount');
                    {
                        xmlChildNodeList2 = xmlInformationNode.childNodes();
                        nodeTable = xmlChildNodeList2.nextNode();
                        // Line record
                        //lineCon = lineCon +  nodeTable.text();
                    }
                }
                //lineCon += recLineData.pack();
                lineCon = conIns(lineCon,l, recLineData.pack());
            }
            else
            {
                // Header record
                recHeadData.insert(nodeTable.nodeName(),nodeTable.text());
                headerCon = headerCon + nodeTable.text();
            }

        }// for j
        recCon = conIns(recCon,1, recHeadData.pack());//headerCon);
       // recCon = conIns(recCon,2, recLineData.pack());//lineCon);
        recCon = conIns(recCon,2,lineCon);
        retCon += recCon;
        recCon = conNull();
    }// for m
    CodeAccessPermission::revertAssert();
    return retCon;
}

-------------------------------------------------------------------------------------------------------------------------
How to use the framework class to do the things
--------------------------------------------------------------------------------------------------------------------------
We are almost there, now we have to read the container and do your stuff, for this I have created a job, which uses the above framework class and to create a XML and also reads the data from the created XML and pints the info.

static void MK_ExportText(Args _args)
{
    MK_ExportHelp      eh;
    container           conTab, recCon;
    container           hCon,lCon,lineCon;
    str                 fname;
    Filename            fileName;
    int                 i,j,k;
    Map                 hMap;
    Map                 lMap;
    MapEnumerator       henu,lenu;

    Query       lquery = new Query('MK_SalesOrder');
    //Construct the framework class object  with the query.
    eh = MK_ExportHelp::construct(lquery);

    fname =MK_ExportHelp::getFileName("AMS_SOTest1");

    fileName   = @"\\Dscax201201\aif\OutBound\Error\MK_SalesOrder.xml";
    // Call this method to create CSV file
    //eh.getCSVFile(fileName,fieldNum(SalesTable, SalesId),'|');

    // Call this method to create XML file
    eh.getXMLFile(fileName,fieldNum(SalesTable, SalesId));
 
    //Call this method to read the data from the above created XML file.
    conTab = eh.readXMLData(fileName);
    i = 1;
    while (i <= conLen(conTab))
    {
        recCon = conNull();
        hCon = conNull();
        lCon = conNull();
        hCon = conPeek(conTab,i);
        lCon = conPeek(conTab,i+1);
        hMap = Map::create(hCon);//conPeek(recCon,1));
        henu = new MapEnumerator(hMap);
        while (henu.moveNext())
        {
            info(strFmt("Header %1 -- > %2",henu.currentValue(),henu.currentKey()));
        }
        for (j = 1; j <= conLen(lCon);j ++)
        {
            lineCon = conNull();
            lineCon = conPeek(lCon,j);
            lMap = Map::create(lineCon);//conPeek(recCon,2));
            lenu = new MapEnumerator(lMap);
            while (lenu.moveNext())
            {
                info(strFmt("Line %1 -- > %2",lenu.currentValue(),lenu.currentKey()));
            }
        }
     
        i += 2;
    }
}

Wednesday 31 May 2017

AIF Outbound Message - Replace data / inserting data into the XML message

In this blog we will lean how to replace the data in the Outbound XML ..


For this we need to override the "processingRecod()" method.

Lets see how it will work.

First we will look at the method
public void processingRecord(Common common)
{
 
    super(common);
}

so you can see that, it passes the common record.

First check if the common record, exist and is of your Table to be modified and update the buffer and assign back the data to common.
In the below eg. I am modifying the VendAccount to CustAccount.

public void processingRecord(Common common)
{
    PurchTable  lpurchTable;
    MK_IntercompanySOParam     parmSO = AMS_IntercompanySOParam::find();
    if (common)
    {
        if (common.TableId == lpurchTable.TableId)
        {
            lpurchTable = common.data();
            lpurchTable.OrderAccount = parmSO.CustAccount;
            common.data(lpurchTable);
           
        }
       
    }
    super(common);
}

After this, we need generate a incremental CIL.

-------------------------------------------------------------------------------------------------------------------------
Alternatively, we can use the outbound pipeline by adding this code in the execute method of the pipeline:
public void execute(AifPipelineComponentRecId componentRecId, AifMessage message, AifPipelineParms parms)
{
    XmlDocument xmlDoc = new XmlDocument();
    XmlNode xmlNode;
    XmlNodeList xmlNodeList;
    XmlElement xmlElement;
    ;

    xmlDoc = XmlDocument::newXml(message.getXml());
    xmlNodeList = xmlDoc.getElementsByTagName("SalesTable");

    // Obtain the first xmlNode.
    xmlNode = xmlNodeList.nextNode();
    xmlElement = xmlNode.getNamedElement("CustAccount");
    xmlElement.text("4005"); // If you use the sample CreateSalesOrder.xml file, the value should be 4000 instead of 4005.
    message.setXml(xmlDoc.xml());
}

Mallik 

Thursday 27 April 2017

Code to check if the Dimension exist for the item AX 2012

The following code is used to check if the Dimension exist for item.
while select inventTable where inventTable.DefaultDimension == 0
    {
       
         if(EcoResStorageDimensionGroupItem::findByItem(inventTable.DataAreaId, inventTable.ItemId).StorageDimensionGroup
            && EcoResTrackingDimensionGroupItem::findByItem(inventTable.DataAreaId, inventTable.ItemId).TrackingDimensionGroup)
        {
            continue; // exist
        }
        else
        {
             // not exist do some thing.
        }
}

Wednesday 26 April 2017

Script to deploy AIF service

Below is the script for automatically deploy or undeploy  AIF service.
In this example update the port with current company and deploy the service.
static void mk_AIFDeployPort(Args _args)
{
    AifPort  port;
    AifPortName portName = "AdvancedBankReconciliation";
    AifPortManager::undeployPort(portName);
    port = AifPort::find(portName,true);

    if(port)
    {
        ttsBegin;
        if(port.Company != curext() )
        {
            port.Company = curext();
            port.update();
        }
        ttsCommit;
    }
    AifPortManager::deployPort(portName);
}

Wednesday 12 April 2017

BAI2 File format Advance Bank Reconciliation

Advance Bank Reconciliation

Advance Bank Reconciliation allows for the import of bank statements that can be automatically reconciled from within AX2012. How to perform an advanced bank reconciliation and assumes that AX has been setup correctly as below.


  1. Ctrl+D to open the AOT. Expand Resources and locate “BAI2CSV_to_BAI2XML_xslt”, and then right-click and click “Open”.
  2. On the form that opens, change “Resource type” to “XML document”. Click “Export”. 
  3. Export the file to a directory on your machine.
  4. Repeat steps 1-3, this time for the “BAI2XML_to_Reconciliation_xslt”.
  5. Go to Tools | Application Integration Framework | Manage transforms. Click “New”, and enter “CSV to XML”. Click “Load”. Change the file extension to “XSLT files” to ensure you can see the files exported earlier. Select the “BAI2CSV-to-BAI2XML.xslt” file, and click “Open”.
  6. Click “New”, and enter “XML to Reconciliation”. Click “Load”. Change the file extension to “XSLT files” to ensure you can see the files exported earlier. Select the “BAI2XML-to-Reconciliation.xslt” file, and click “Open”.
  7. Close the “Manage transforms” form and close the AOT.
  8. Go to System administration | Setup | Services and Application Integration Framework | Inbound ports. Click “New”, enter “AdvancedBankReconciliation” for the “Port name” and “Description”. Change the “Adapter” to “File system adapter”. Click the drop-menu for “URI” and click the location of the bank transform files.
  9. On the “Service contract customizations” fast tab, click “Service operations”. Select BankStmtService.create, BankStmtService.delete, BankStmtService.find, BankStmtService.getChangedKeys, BankStmtService.getKeys, and BankStmtService.read, and move them to the “Selected service operations” section. Close the “Select service operations” form.
  10. On the “Processing options” fast tab, check the box for “Transform all requests” and click “Inbound transforms”.
  11. On the “Inbound transforms form, click “New”. Select “XML to Reconciliation” for the “Transform name”. Click “New”, and click “Yes” to the warning box. Select “CSV to XML” for the “Transform name” and Ctrl+S to save, and click “Yes” again to the warning box. 
    **Be sure that “CSV to XML” is the first line and “XML to Reconciliation” is the second record to have the correct order for the transforms. Close the “Inbound transforms” form.
  12. In the “Troubleshooting” fast tab, change the “Logging mode” to “Original document”. In the “Security” fast tab, select “initial” for the “Restrict to partition”.
  13. Lastly, click “Activate” to activate the new inbound port.
  14. Go to Cash and bank management | Common | Bank accounts. Select the “USA OPER” account and click “Edit”.  Expand the “Reconciliation” fast tab, and check the box for “Advanced bank reconciliation”. Click “OK” to confirm. 
  15. In the same section, right-click the drop-menu for “Statement format” and click “View details”. On the “Bank statement format” form, click “New”. Enter “BAI2” for the “Statement format” and “Name”. Select “AdvancedBankReconciliation” for the “Inbound port” and close the form. 
  16. On the “Bank accounts” form, select the drop menu for “Statement format”, and select “BAI2” that was just created. Close the “Bank accounts” form.
  17. Go to Cash and bank management | Setup | Cash and bank management parameters. Click the “Number sequences” tab, and select a number sequence for “Reconcile ID”, “Statement ID”, and “Download ID”. Close the form.
  18. Go to Cash and bank management | Common | Bank statements. Click “Import statement” in the action pane. Change the “Bank account” to “USA OPER”, select “BAI2” for the “Statement format”, and navigate to the location of the .txt file from the bank in the “File folder” line. Select the bank file, and click “OK”. 
  19. Click “Refresh” on the bank statements list page. Select the imported bank statement, and click “Validate” on the action pane.

NOTE: If you’re having issues getting your statement to import, we have updated the CSV->XML transform XSLT file to handle certain scenarios. This fix can be downloaded from PartnerSource or Lifecycle Services by searching for KB 2964064, or by opening a support request.

AIF inbound port
By legal entity
The inbound port that is used for importing bank statements must be mapped to a legal entity. It is a design requirement that, if there is more than one legal entity for which statements must be imported, each legal entity must have its own inbound port configured for import.

Tip: It is not required to restrict the inbound port to a legal entity if there is only one legal entity for which statements will be imported. In such cases, the statement is imported either manually or by using a batch job.

Steps


Advanced bank reconciliation is a new feature of AX2012, available from R2 onwards.


This new feature allows for the import of bank statements that can be automatically reconciled from within AX2012. This blog shows how to setup the InBound port to import and transform a BAI2 bank statement file.

BAI2 Format – File Layout:

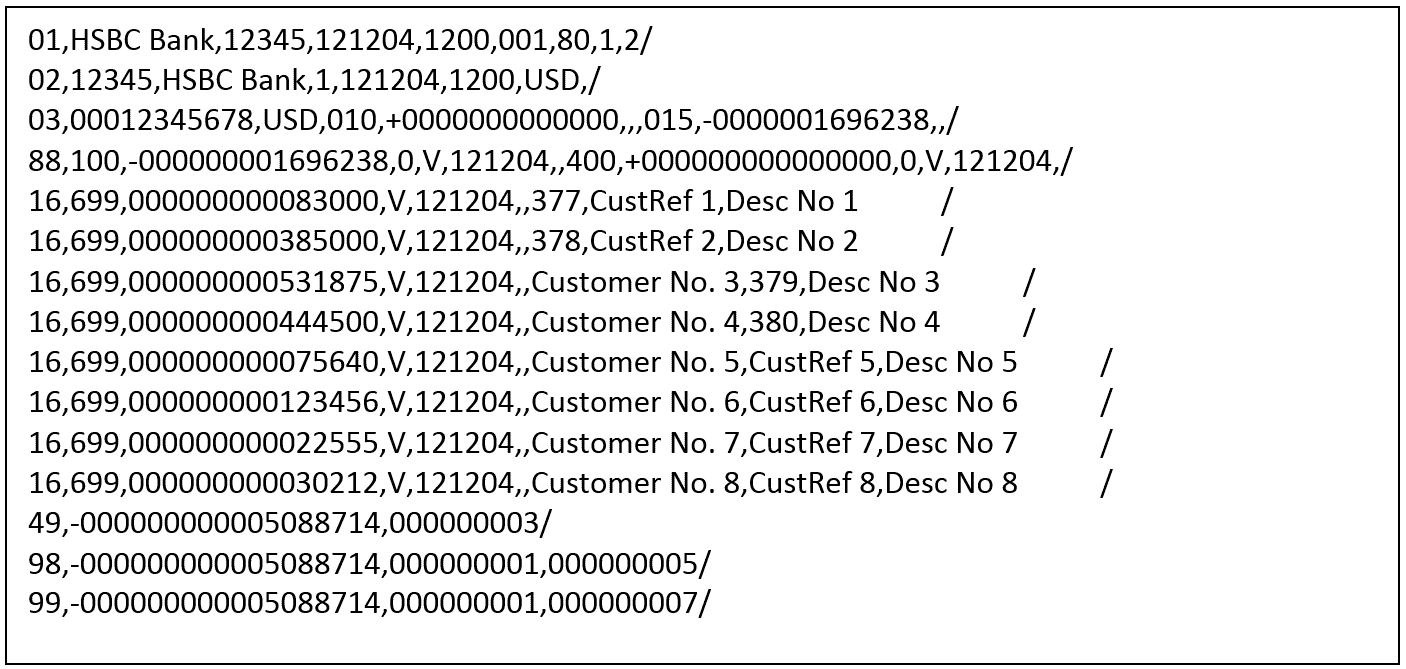
  • Record Type: 01 – File Header – indicating the beginning of the file
  • Record Type: 02 – Group Header – identifying the group of accounts – a file may contain multiple groups, and would be followed by a 03 record
  • Record Type: 03 – Account Identifier & Summary Status – indicating the account number, activity summary and account status information
  • Record Type: 16 – Transaction Detail – as it says! Transaction detail information such as generic reference information is indicated in this record type (optional record)
  • Record Type: 49 – Account Trailer – indicating account control totals
  • Record Type: 98 – Group Trailer – indicating group control totals
  • Record Type: 99 – File Trailer – end of file indicator

BAI2 file:

  • Will only ever contain 1 record header (record type 01) and file trailer (record type 99)
  • Can contain multiple groups, where this happens the record type 02, 03, 16, 49, 98 would be repeated

BAI2 Record Formats:

Note: All of the below fields within a specific record are comma separated
BAI2 Format – File Header – 01
  • Record code - 01
  • Sender Id – alphanumeric value
  • Receiver Id – alphanumeric value
  • File Creation Date – YYMMDD format
  • File Identification Number – Unique value to distinguish files sent on the same date
  • Physical Record length – optional
  • Block Size – optional
  • Version Number – 2
BAI2 Format – Group Header – 02
Note: A group header highlights accounts from the same originator with the same as-of date
  • Record Code – 02
  • Ultimate Receiver Notification – optional, normally banks put the same value as in Receiver Id from the Header Record
  • Originator Identification – bank code or SWIFT BIC where the account being reported (in record 3) is held
  • Group Status:
    • 1 – Update – most commonly used for previous day reporting and same day reporting
    • 2 – Deletion
    • 3 – Correction
    • 4 – Test Only
  • As of Date – YYMMDD – as of date of all accounts with the group
  • As of Time – HHMM – in military format i.e. from 0000 – 2359
  • Currency Code
  • As of Date Modifier:
    • 1 – Interim previous day data
    • 2 – Final previous day – most commonly used for prior day reporting
    • 3 – Interim same day – most commonly used for intra-day reporting
    • 4 – Final same day
BAI2 Format – Account Identifier & Summary Status – 03
  • Record Code – 03
  • Customer Account Number – at the originator financial institution
  • Currency Code – optional
  • Type Code – optional* – indicates the type of balance (Summary/Transaction) being reported. - in this record type Account Status &  Activity Summary codes are used
  • Amount – optional
  • Item Count – optional*
  • Funds Type – optional*
BAI2 Format – Transaction Detail – 16
  • Record Code – 16
  • Type Code – details data type* – indicates the type of balance (Summary/Transaction) being reported. - in this record type Transaction Detail codes only are used
  • Amount
  • Funds Type*
  • Bank Reference - bank assigned reference to help identify the transaction
  • Customer Reference – as corporates, this is the field we’re interested in. It should contain our reference for reconciliation purposes
  • Text
BAI2 Format – Continuation Record – 88
If the data in any record type exceeds the physical record size, or if required for any other reason the 88 record type can be used to continue the previous record. A record type 88 can only follow a record type 03 (Account Identifier), 16 (Transaction Detail) 0r 88 (Continuation Record)
  • Record Code - 88
  • Next field
BAI2 Format – Account Trailer – 49
  • Record Code – 49
  • Account Control Total – Sum of all the Amount fields in the preceding 03 (Account Identifier) and all 16 (Transaction Detail) records
  • Number of Records – Total number of records for the account – including the 03, all 16 and 88 records and this 49 record
BAI2 Format – Group Trailer – 98
  • Record Code – 98
  • Group Control Total – Sum of all control totals in this group
  • Number of Accounts – The number of 03 records in this group
  • Number of records – The number of records in this group – including the 02, all 03, 16, 49 and 88 records, and this 98 record
BAI2 Format – File Trailer – 99
  • Record Code – 99
  • File Control Total – Sum of all control totals in the file
  • Number of Groups – The number of 02 records in this file
  • Number of Records – Total number of records in this file, including this 99 record


BAI2 File Format


The Bank Administration Institute (BAI) file format is used to electronically transmit transaction data from a bank to an organisation. Bank Administration Institute version 2 (BAI2) splits the payment amount into separate invoice references and corresponding payments. 

Note : BAI2 files are the file formats not always provided by some banking corporations, and as such bank file formats may need to be developed to suit the customer’s needs. The BAI2 file format is used here for demonstration purposes only.

The BAI2 file format is a structure text file with headers, lines and footer records. Each field is separated by a comma similar to a CSV file. 

With a multi date file format, each date must be contained within its own section, with a header and line for each section.

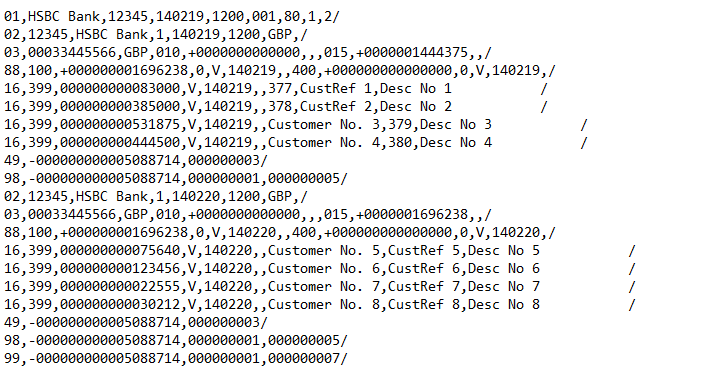
Sample file can be found here : Download Sample File 
Example 1 – Single date file

Example 2 – Multi date file

AIF Setup


In the AOT, under the Resources node, locate the BAI2 files. These files translate the electronic bank statements from their original format to a format that Microsoft Dynamics AX can use. 

The files that are required are called : 
  • AOT\Resources\BAI2CSV_to_BAI2XML_xslt 
  • AOT\Resources\BAI2XML_to_Reconciliation_xlst

Right-click the BAI2CSV_to_BAI2XML_xslt file, and then click Open 


In the Preview form, select XML document in the File type field.  


Click Export to generate XSLT templates and save the template. Close the form. 

Repeat the process for the BAI2XML_to_Reconciliation_xlst file.


Whilst in the development environment, click the Tools menu option and select “Application integration framework > Manage transforms” 


Create a new record, give this a name and an appropriate description, ensure that the type = “XSL”, then click load. Load the BAI2CSV_to_BAI2XML_xslt file.
Create a second record and load the BAI2XML_to_Reconciliation_xlst file.


Close the form and close the development environment.

InBound Ports


Before you can receive the BAI2 statement electronically, you must register custom services and adapters, manage operations and inbound transforms, and activate inbound ports. 

Browse to System administration > Setup > Services and Application Integration Framework 

Click New to create a new inbound port. 

In the Port name and Description fields, enter a suitable name and description of the inbound port. In the Adapter field, select File system adapter as the adapter name. In the URL field, enter a path for receiving electronic data. 


On the Service contract customisations FastTab, click Service operations to open the Select service operations form.


Add in the following bank service operations to the “Selected service operations” section.
In the Select service operations form, select the following from Remaining service operations and move to Selected service operations:
  • BankStmtService.create
  • BankStmtService.delete
  • BankStmtService.find
  • BankStmtService.getChangedKeys
  • BankStmtService.getKeys
  • BankStmtService.read


On the Processing options FastTab, select the Transform all requests check box to include inbound transforms. Then click the “Inbound transforms” button.


Click New to create a transform. Select the first of the transforms that you have already created previously.
Create a second record and add the second transform file that you have created.


These files should be in the following order to process the BAI2 file correctly. 
  1. BAI2CSV_to_BAI2XML_xslt
  2. BAI2XML_to_Reconciliation_xlst

Close the form. 


On the Troubleshooting FastTab, set the logging mode to “Original document”. 


On the Security FastTab, select the partition and company that this Inbound port relates to.


Once complete, click the “Activate” button to finish, this may take some minutes to complete. Close the forms when finished.


This completes the InBound port setup and AX2012 R2 is now ready to import and transform a BAI2 file.
Set up matching rules
You can set up reconciliation matching rules and matching rule sets to help with the bank reconciliation process. Reconciliation matching rules are a set of criteria that are used to filter bank statement and bank document lines during the reconciliation process. Using the Reconciliation matching rules form, you can select which actions and selection criteria are used when the matching rule is run during reconciliation.
Available actions include: Match with bank document – this action allows you to create criteria for how bank document and bank statement lines are matched.
Clear reversal statement lines – this action allows you to specify how reversal statement lines should be removed.
Mark new transactions – this action allow you to specify how new transactions are handled when the reconciliation rule runs.


SETUP/CONFIGURATION OF RECONCILIATION MATCHING RULES:

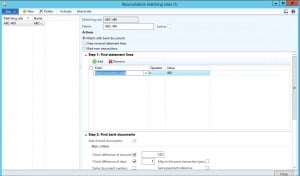
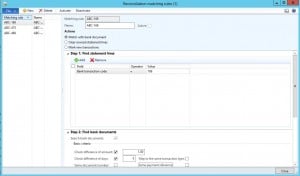
1. A Reconciliation matching rule should be created for the 469 Bank Transaction code that resembles the following.
SCREENSHOT469
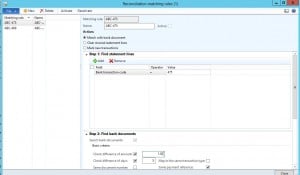
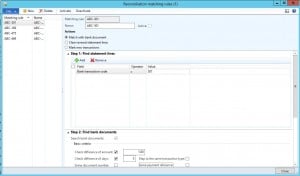
2. A Reconciliation matching rule should be created for the 475 Bank Transaction code that resembles the following:
SCREENSHOT475
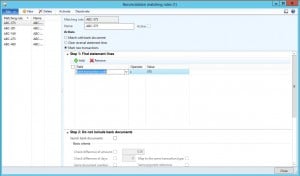
3. A Reconciliation matching rule should be created for the 169 Bank Transaction code that resembles the following:
SCREENSHOT169
4. A Reconciliation matching rule should be created for the 301 Bank Transaction code that resembles the following:
SCREENSHOT301
5. A Reconciliation matching rule should be created for the 575 Bank Transaction code that resembles the following:
SCREENSHOT575

6. Activate the reconciliation matching rules so that the Reconciliation matching rules have the Active flag marked.

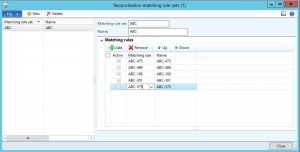
7. Assign the Reconciliation matching rules to a Reconciliation matching rule set. The Reconciliation matching rule set would them resemble the following:
SCREENSHOTSET

After the Setup/Configuration of these Reconciliation matching rules that are now included in the single Reconciliation matching rule set, you can select this Reconciliation matching rule set on the Bank reconciliation journal after the Bank statements have been imported. By using the simple Setup/Configuration of the Reconciliation matching rules, you can use these Reconciliation matching rules in a manner that allows you to automatically match/create new adjustments for imported bank statements in AX
Reconcile a bank statement
After the bank statement has been imported into the Bank statements form, you can reconcile the bank statement by using the Bank reconciliation worksheet form.
On the bank reconciliation form, you will see the bank statement and the bank documents transactions listed. You can select transaction lines that match up to reconcile them.

Import The Bank Statement


Once a bank account has been set up to allow bank statement imports, the “Reconcile” group becomes available in the action pane. 


Click the “Bank statements” button to open the bank statements list page. 


The following form will be opened, click the “Import statement” button to continue.

Select the following : 
  • Bank account – Select the bank account that the statement will be imported into.
  • Statement format - Select the appropriate bank statement format.
  • File folder – Set the inbound folder where the files to be processed are held.
  • Import all files in this folder – Tick this is all files in the folder are to be imported.
  • Select file – Use this option to manually select a specific file. Reconcile after import – Select this to perform automatic reconciliation (Only if the rules have been set against the bank account).

Click Ok to continue.


When opened, the following will be displayed.


The “Net amount” and the “Total lines” fields will automatically populate when the “Validate” button has been clicked. 
The bank statements must be validated before a reconciliation can be performed.

Bank Reconciliation


After an electronic bank statement has been imported and validated in the Bank statements form, the bank statement can now be reconciled using the Bank reconciliation worksheet form. 


Note : The Bank reconciliation option is only available if the Advanced bank reconciliation check box is selected in the Bank accounts form on the Reconciliation FastTab. 


This can be performed in one of two ways : 


Click Cash and bank management > Journals > Bank reconciliation 


Or 


Click Cash and bank management > Common > Bank accounts. On the Action pane, in the Reconcile group, click Bank reconciliation.

Click New to create a new bank reconciliation record


Select the appropriate bank account, this will select the bank statements that have not yet been reconciled.


Note : Any previous un-reconciled balances will be added in to this bank reconciliation journal.


Click the “Lines” button


The reconciliation worksheet will be displayed, this worksheet is split into four distinct grids : 
  • Top left – Open statement lines – Imported un-reconciled bank statement lines
  • Top right – Open bank documents – Un-reconciled AX bank transactions
  • Bottom left – Matched statement lines – Matched bank statement lines Bottom right Matched bank documents – Matched AX bank transactions
 
The Line details FastTab will show additional line details for the selected statement line.


To match using the matching rules that have been set up, click the “Run matching rules” button.

Select either to run individual rules, or to run a set of rules.


Once run these match all transactions that meet the criteria set on the rules.

There is a one-to-many relationship between the “Matched statement lines” and the “Matched bank documents”.
Transactions can be manually matched by selecting the appropriate line(s) in both the Open statement lines grid and the Open bank documents grid, then clicking the “Match” button.

If there is a new transaction on the bank statement that does not yet exist in AX (eg bank charges), then mark the transaction and click “Mark as new”.


Once you have completed your matching process, click “Reconcile” to perform the reconciliation process.

If there are any transactions that you have marked as new, these will need to be posted. 


Browse to : Cash and bank management > Common > Bank statements, then edit the appropriate statement.
Select the line marked as “New”

On the line details FastTab, enter the appropriate financial details and financial dimension values

Then click “Post” to post the transaction.


The transaction will now have been posted and reconciled.

Cancel A Reconciled Transaction

 Individual “reconciled” bank transactions can have the reconciliation status set back to un-reconciled.
To do this browse to : Cash and bank management > Common > Bank document list 
Select the reconciled transaction, then click “Reconciliation relations”

From the Reconciliation details form, click the “Cancel reconciliation” button

Click OK to continue

The transactions will appear on the next reconciliation as un-reconciled items


The bank statement will have been fully reconciled now.

White paper like

Update NuGet package to new MS D365FO version

1. Import the NuGet package files from LCS for that particular version please take the PU version files only. a. Goto LCS-->Asset Libra...